Alright, let's talk chain link fences. Maybe you're looking to secure a yard, keep a dog in, or just define a property line without breaking the bank. Chain link is a solid, practical choice for a lot of folks here in Spearfish. Now, can you install one yourself? Absolutely, parts of it. But there are definitely times you'll want to tap someone with more experience. Let's break it down.
Before You Even Dig a Single Hole
This is where most DIY projects go sideways if you're not careful. Planning is huge, especially with fencing.
- Know Your Lines: First thing's first, figure out exactly where your property lines are. Don't just guess. Get a survey if you're not 100% sure. Nothing starts a neighborhood spat faster than putting a fence on someone else's land.
- Call Before You Dig: This isn't optional, it's the law. Dial 811 a few days before you plan to start. They'll mark out underground utilities like gas, water, and power lines. Hit one of those, and your DIY project just turned into a major headache and a huge bill. Trust me, I've seen it happen.
- Check Local Ordinances: Spearfish has its own rules about fence height, setbacks from property lines, and sometimes even materials in certain zones. You don't want to build a whole fence only to find out you have to tear it down because it's too tall or too close to the sidewalk. Swing by the city planning office or check their website. It'll save you a ton of grief.
- Material List & Tools: Once you know your layout, measure everything. You'll need posts (terminal posts for ends, corners, and gates; line posts for everything in between), top rail, chain link fabric, tension bands, brace bands, post caps, tension bars, tie wires, and gate hardware if you're adding a gate. For tools, you'll need a post-hole digger (manual or powered), a level, string line, tape measure, pliers, a wrench, and maybe a hacksaw or grinder for cutting top rail if needed.
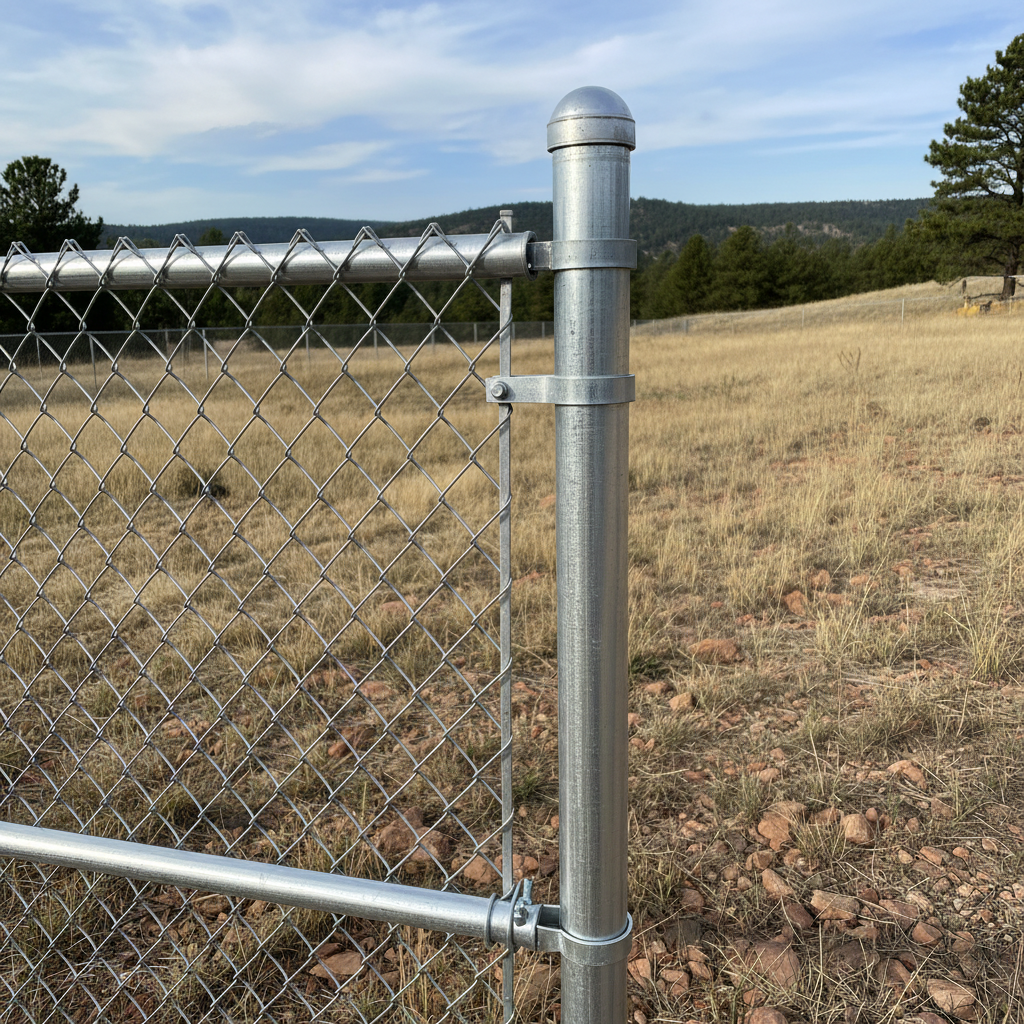
Getting Your Posts in the Ground
This is probably the most critical part of the whole job. If your posts aren't set right, your fence will look sloppy and won't last.
- Marking It Out: Once utilities are marked, lay out your fence line with string. Mark where every post will go. Terminal posts (ends, corners, gates) usually need deeper, wider holes than line posts.
- Digging Those Holes: For terminal posts, you're usually looking at 24-30 inches deep and 8-10 inches wide. Line posts can be a bit shallower, around 18-24 inches deep and 6-8 inches wide. Now, here in Spearfish, we've got some pretty rocky soil in places, especially up on the benches or closer to the hills. You might hit some serious rock, which can make digging by hand a real pain. If you're struggling, that's a sign to rent a power auger or, honestly, call someone like Mighty Fence Co. We've got the heavy-duty equipment to get through that stuff without you breaking your back or your shovel.
- Setting Posts with Concrete: This is where you want to be precise. Put a few inches of gravel at the bottom of each hole for drainage. Set your post, make sure it's perfectly plumb (level in all directions) using your level, and then pour concrete around it. Mix your concrete properly – not too wet, not too dry. Crown the top of the concrete so water sheds away from the post. Let that concrete cure for at least 24-48 hours, or even longer if it's cold out, before you put any tension on it. Don't rush this part.
Attaching the Fabric and Finishing Up
Once your posts are solid, the rest is more assembly than heavy lifting.
- Top Rail: Install your top rail through the loop caps on your line posts and connect them with sleeves.
- Tension Bands & Bars: Slide your tension bands onto your terminal posts. Weave a tension bar through the end of your chain link fabric and attach it to the terminal post with the tension bands.
- Stretching the Fabric: This is where a fence stretcher comes in handy. You want the fabric taut, but not so tight you're distorting the mesh. Work your way down the fence line, attaching the fabric to the top rail with tie wires every 2 feet or so, and to the line posts every 12-18 inches. This takes a bit of feel to get right. If your fabric is sagging, it'll look bad and won't hold up. If it's too tight, you could pull posts out of alignment.
- Gates: Installing gates involves hinges and latches. Make sure they're hung straight and swing freely.
When to Call in the Pros
Look, I'm all for homeowners tackling projects, but sometimes, it just makes sense to bring in the experts. Here's when I'd say it's time to pick up the phone:
- Rocky Soil: Like I mentioned, if you're hitting solid rock every other hole, your time and frustration might be better spent elsewhere.
- Large or Complex Jobs: If you've got a really long fence line, multiple gates, or tricky terrain, it's a lot of work. We've got the tools and crew to get it done efficiently.
- Perfectly Straight & Level: Getting a long fence line perfectly straight and level, especially on a slope, is harder than it looks. We do this every day, so we've got the eye and the tricks for it.
- Time is Money: Your weekend is valuable. If you'd rather spend it hiking Crow Peak or fishing Spearfish Creek than digging holes, that's a good reason to call us.
A DIY chain link fence is definitely doable for the handy homeowner, especially for smaller, simpler runs. Just be honest with yourself about your skills, your patience, and what the ground's going to throw at you. If you get stuck or decide it's more than you bargained for, give Mighty Fence Co. a call. We're always happy to help our neighbors here in Spearfish.